


Pressure Cooking Preambles.
Searing, sauteeing, sweating....


The starting point – and main focus - for this post was going to be the importance of deglazing (the lifting of anything stuck to the base of your pressure cooker before putting the lid on), but as I worked back and thought about why we need to deglaze, it occurred to me that really we should be looking at the pre-deglazing processes first and how to ensure they are efficient – not just in terms of how the food is cooked but in terms of making deglazing - and therefore pressure cooking - easier.
I hope that even if you are a very experienced cook, there will be something useful here about these processes in terms of how they apply to pressure cooking.
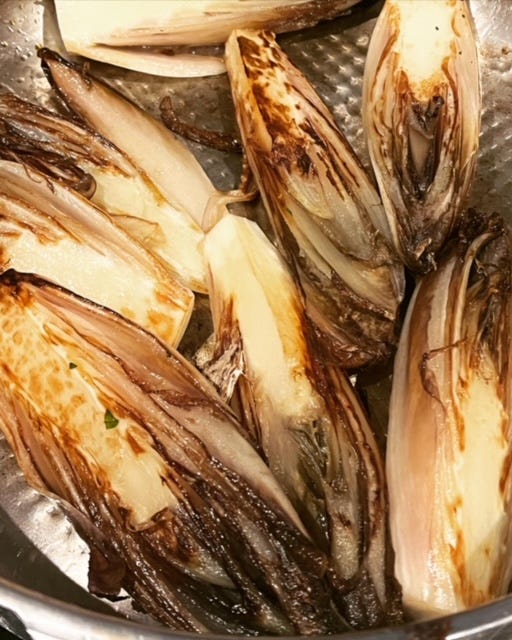
Many pressure cooker recipes – like most conventional recipes – start in a very similar way. That is of course the heating of some kind of oil or fat and adding onion (if I had a £ for every time etc). A lot more besides start with the searing of meat or vegetables. These processes are about dry cooking. Searing is hot and fast to develop a crust on usually larger cuts of ingredients, particularly meat but also vegetables such as aubergines, wedges of cabbage or endives as shown in the photo below. Sauteeing is slightly gentler and is still about getting a little colour onto generally smaller cuts. Sweating is a much gentler process and is about cooking without significantly changing the colour (apart from opacity to translucence). All will usually need to be followed by deglazing in lessening degrees, sometimes after adding other ingredients which can have a tendency to leave a layer on the base, especially if you are using just small amounts of oil/fat - I’m thinking things like ground spices, tomato puree, anything starchy.
Both searing and sauteeing are key stages in developing flavour. Searing involves a deep and thorough browning so a rich crust develops and it has a greater flavour impact – that “burnt end” umami flavour which is so appealing and sets off the tastebuds. It is also about creating crispness and reducing flabbiness, achieved as the process renders out fat and steams off moisture. This is the process to use when you are going to follow up with braising, pot roasting, (pressure) roasting and casseroling or simply when you want that depth of flavour.
Sauteeing will also involve the food taking on some colour but the flavour impact isn’t as intense. This is because pressure cooking is very good at developing that same flavour which comes about via Maillard Reaction, a process similar in result to caramelisation. This starts kicking in at around 115C regardless of cooking method. High pressure cooking is generally at 118-120C.
Sweating is less about flavour – although when cooking conventionally it does help with sweetness – or texture, but more about helping the pressure cooking process. Sweating (and sauteeing too to a lesser extent), kick starts the process of releasing liquid from vegetables. This reduces the volume of the food a little, creates steam, which means that the cooker will come up to pressure faster once the lid is on and also – and this is the important bit – helps reduce the water content of the vegetables which means they will be less likely to flood your finished dish with liquid. Of course, this isn’t an issue if you are cooking anything particularly wet such as a soup or stew, which is why I am more likely to cut out this step with those kinds of dishes. But water content of food does have to be taken into account with drier dishes.
This might be an obvious thing to say but most people will start off all of their pressure cooked dishes in their pressure cooker. This can be a steep learning curve for some people simply because most pressure cookers are stainless steel and they are used to using mainly non stick cooking vessels. Stainless steel is not non stick and you can’t season stainless steel pressure cookers to become so as you can with a frying pan simply because if you allow a non stick patina of oil to build up, it will eventually inhibit the pressure cooker from coming up to pressure.
You can get round this in a few ways. Some people do all their searing and sauteeing in a frying or saute pan and transfer to the pressure cooker. There is an advantage to this – unless you are regularly using a pressure cooker with saute pan dimensions, the sides of a frying/saute pan will be much shallower which makes both processes much easier. Also, some electric pressure cookers are more sensitive than others and I do hear of high heat searing leading to burn notices as the pressure cooker just gets too hot. If you find this happens regularly to you, a frying pan is the better option rather than compromising on how well browned your food is. You won’t miss out on any flavour as long as you still deglaze the frying pan and transfer the results of this to the pressure cooker. It does create more washing up, obviously. I do it when I am in a hurry and dealing with very large batches. But really the best thing to do is to make sure you know how to sear and saute on stainless steel, so here are a few tips:
Firstly, try to make sure your ingredients are at room temperature before you start cooking. This is especially important with meat which will usually be fridge cold. Half an hour in a warm kitchen should be enough.
Secondly, preheat the pressure cooker. This has the effect of diminishing the natural porosity of stainless steel so when you add oil it will glide over the top and create a seal, rather than sink into it. It is quite amazing how much of a difference this makes. I do this on a medium heat for 2-3 minutes, and can usually tell how hot it is by holding my hand over it. Until you are confident, add a few drops of water each time – the water should sizzle and immediately create steam – as well as roll/jump around a little. At this point you can add oil/butter, making sure you swirl it around to coat the entire base - you will see it spread much more evenly than on an unheated surface.
Thirdly, when sauteeing and searing, make sure you don’t overcrowd the cooker and work in batches if necessary. Otherwise the food will create too much steam and you will end up with wet steamed food instead of a good dry crust.
Finally, try to avoid turning/lifting the food until it comes clean away from the cooker with very little assistance. If you try to lift it off and it has stuck, it usually means it needs a little longer. If you are sure it is brown enough and it is still sticking, add a tiny bit more oil or butter around the edges and it should lift off more easily.
Following all of these steps will help reduce the amount of food sticking to the base which is important when it comes to easy deglazing, which in turn is very important if you want to make sure your pressure cooker comes up to pressure – or in the case of an electric pressure cooker, triggers the dreaded burn notice.
There is one more thing you can do, which those of you who have Modern Pressure Cooking may have read about. You can cut a round of reusable cooking/baking liner such as Bake-O-Glide and put it in the base of your cooker. I do this when I don’t want to use a frying pan and reserve it for those tricky starchy ingredients such as peeled potatoes which can be a nightmare to keep intact when sauteeing. I use it under pressure too, when I am cooking things like potstickers, but that is a whole other post.
Next week I will get onto deglazing proper, promise.
Finally - a piece of good news (for me at least) - Modern Pressure Cooking is back in the warehouse and can now ordered from your independents and bought online. So relieved!
Great post, perfectly pitched. These basics are critical to cooking well and, from a personal viewpoint, I LOVE the science of how cooking works (Maillard reaction- swoon!). Just Good Stuff.
Also, yay, my copy is now ordered from my BS!
I tend to use a fry pan because, being short, standing over my rather tall pressure cooker when it is on the table/counter is a bit uncomfortable. I can't see into it properly. I tried putting it on the floor but that made me feel like one of Macbeth's witches.